Are you looking for a virtual tool to bring your community together? Facebook Premiere might be the answer!
Facebook Premiere is a feature that allows you to upload and schedule pre-recorded videos to broadcast live on your Facebook page. You get to take advantage of the benefits of Facebook Live, but with pre-recorded video, instead. This means you can prepare a more polished, professional video yet get the benefit of live engagement from viewers. After the premiere is complete, the video will still be posted on your page.
Ideas for your school might include:
- Virtual student awards
- Retirement recognition
- Staff awards
- Weekly announcements
- Back to school information
- FAQ – pre-recorded for most commonly asked questions, but people can ask questions in the comments and you can respond there
So how do you set up a Facebook Premiere? It’s easy!
Step 1: Prepare your Video
Once you select your topic for your video, you need to record and edit it. This could be as simple as using one video clip taken with a cell phone, or it could involve multiple videos, photos, and adding words onto the screen to enhance the production quality.
If you’re just getting started, don’t overwhelm yourself with advanced video production. If you’re ready to try, here are a few tools that could help. I’ve also included two previous blogs we’ve shared here at SocialSchool4EDU.com.
Creating Better Videos with Tools You Already Have
9 Ideas for Leadership Videos (Besides Snow Day Announcements)
Step 2: Upload your Video
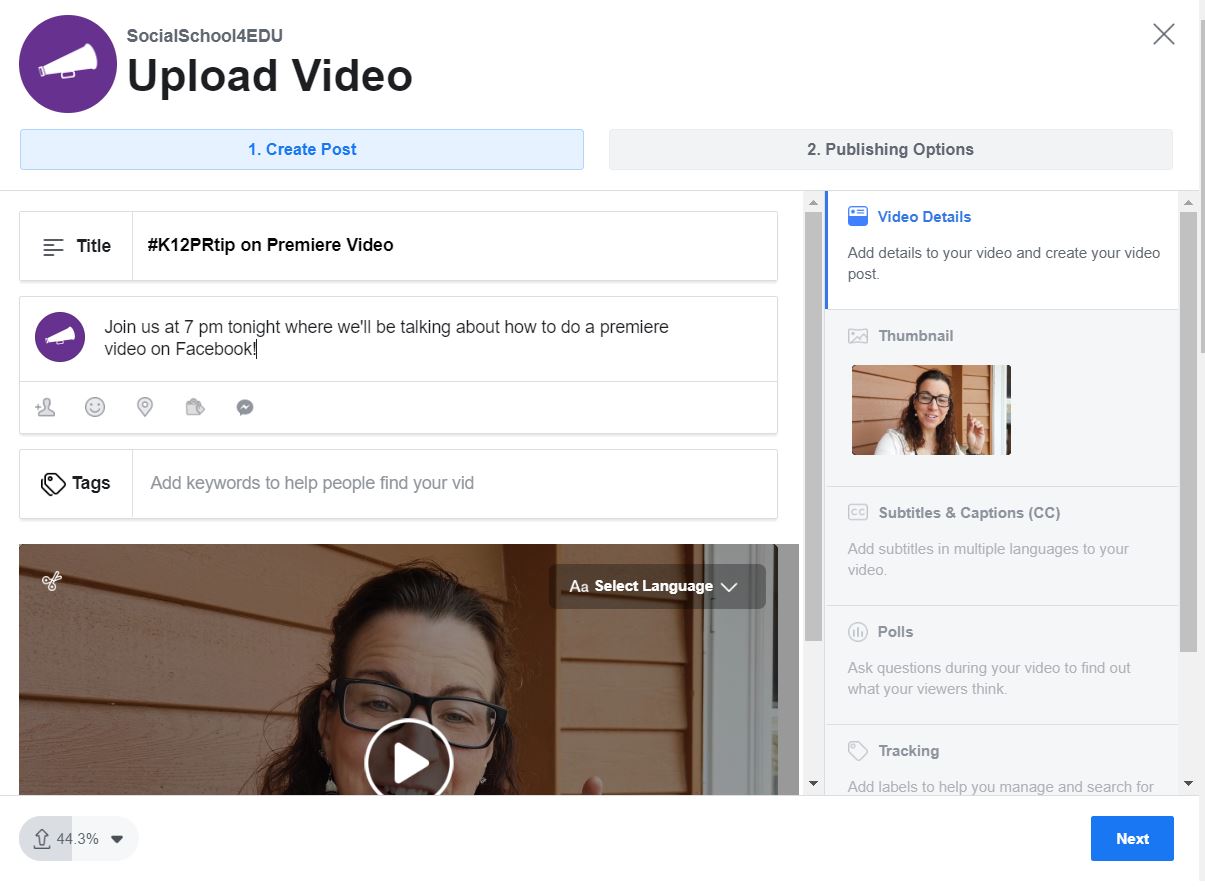
You’ll upload your video to Facebook just like normal. Add a title and include a description of what your fans can expect to see in the video. Some important notes include:
- The video must be at least 30 seconds in length
- It must be no larger than 1920 X 1080 pixels
- The file can’t exceed 10GB
- Suggest format is MP4
- You can add closed captions
Step 3: Schedule as a Premiere
Select the date and time you want to premiere your video. I suggest that you schedule the video at least four hours from when you upload it, but it could be up to one week ahead of time. You can’t schedule a premiere for more than seven days in advance. You can also promote the premiere event through other channels.
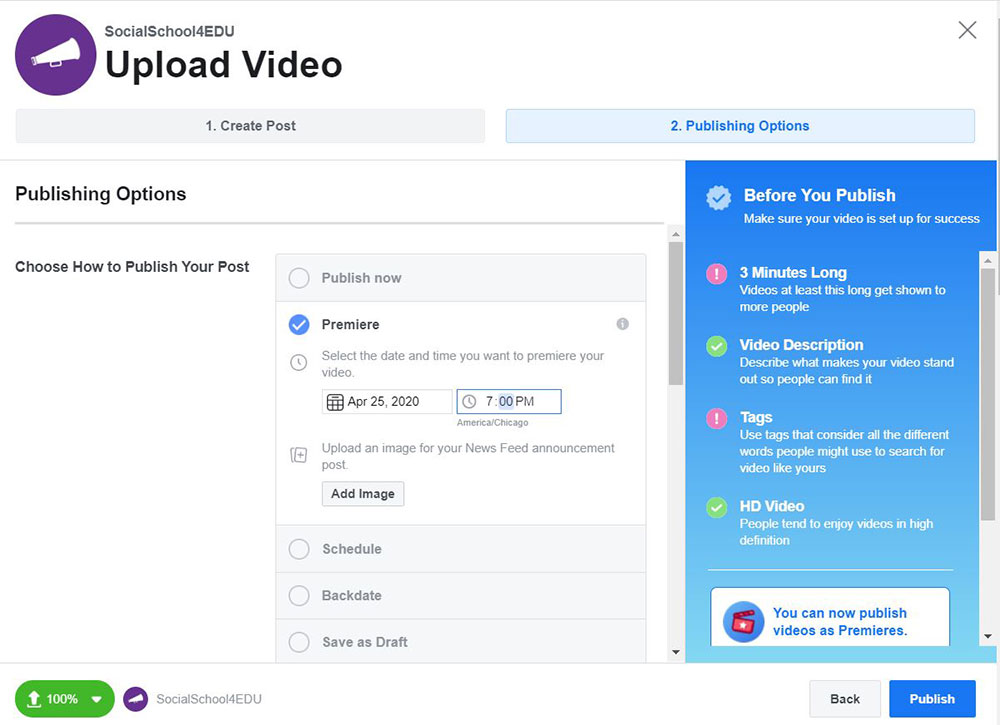
Once you schedule a premiere, a post is published to your page. The image that will be used in the post will be your Facebook cover image unless you upload a different image. If you choose to add a new image, make sure it is 1920 X 1080 pixels so that it appears in full on the post.
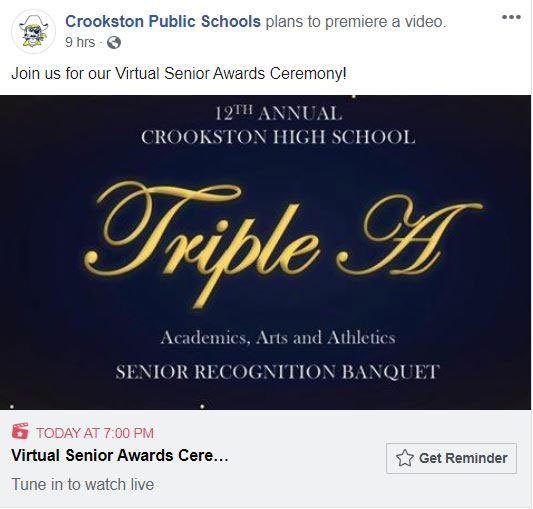
Your work is basically done, but now your followers can hit the “get reminder” button on the post that is published to your page. If they ask for the reminder, they will receive a notification on Facebook about 20 minutes before the premiere begins.
Three minutes before, there is a broadcast lobby that will countdown until the start of the video.
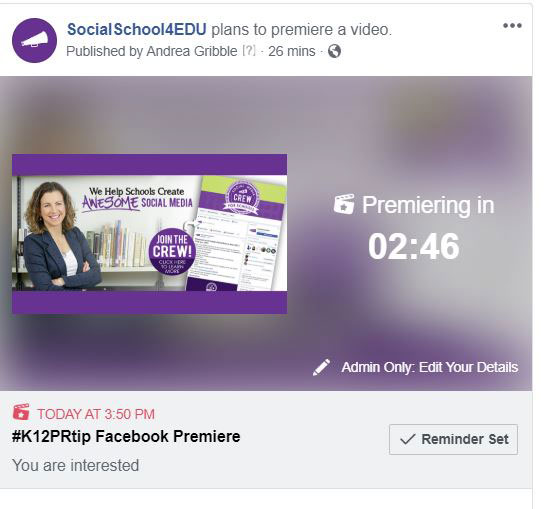
Step 4: Watch & Engage at Scheduled Time
At the date and time scheduled, the video will go live. As soon as your video publishes, people will be able to watch, chat, and engage with it in real-time. You will also be able to see how many people are watching the video at the same time. As with live video, emojis appear on the screen as viewers react. Afterward, it will appear as a regular video post.
You should be present during the live video to respond to comments and interact! If you want just one example for an awards ceremony, check this out from Crookston, MN.
That’s it – now it’s your turn to try it out! I’d love to see your Facebook Premiere video examples in the comments below. If you feel like you still need a little more help, check out this short video that walks you through the process!
And if this blog was helpful, you’ll want to stay connected with all of our upcoming tips, tricks, and strategies for school social media! Sign up for our free newsletter right here.


