Do you wonder how some schools find time to post 3-4 times per day?
If you are just getting started, posting even once per day can seem overwhelming!
Well worry no more. Facebook has an easy to use feature that allows you to schedule status updates, photos and links to be posted at a future time. Up to 6 months in the future, in fact.
It is so easy to use – I assumed EVERYONE knew how to use it. But I was surprised that at my last training with schools – NO ONE was aware of it. This is probably because on a personal page, scheduling is not an option.
The scheduling feature is such a valuable, time saving trick. You can sit down at the beginning of each month and get all your lunch menus, event reminders, and Throwback Thursday (#TBT) photos posted at one time.
You don’t have to physically be at your computer or device to make posts! I recently talked to a business owner who made a habit of getting up at 4:30 am on certain days of the week to have posts go up at 5 am – now that is dedication. Imagine how happy he was when I showed him how this feature worked!
If you like video – click here for an 85 second walk through.
If you prefer to just read the steps – here they are:
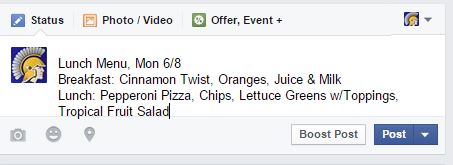
- Type in your status update text and include your image or images that you want to post at a future time.
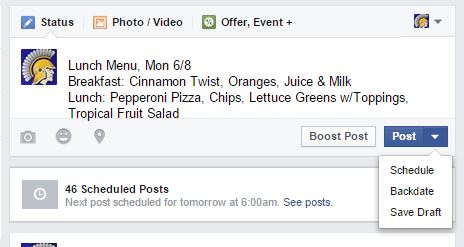
- Select the small arrow next to the word “Post”. Choose “Schedule.”
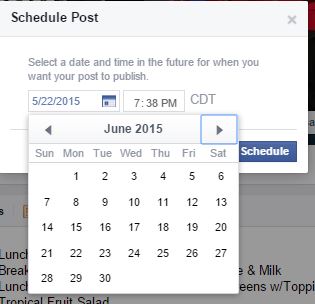
- A calendar and clock will appear. Select the calendar day you’d like to post.
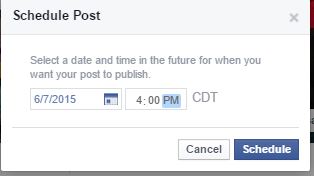
- Select the time of day (for lunch we will select 4 pm) and hit “Schedule.”
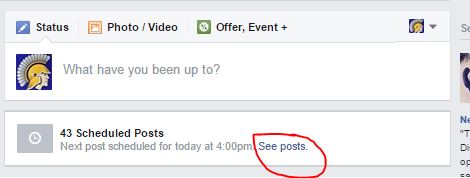
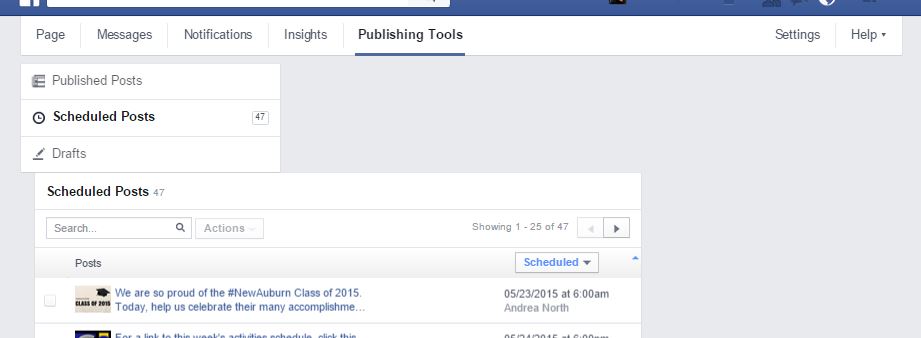
- The box underneath the status box will show you how many upcoming scheduled posts you have (this page currently has 43 posts). To see or modify posts, you can hit the blue “See posts” link.
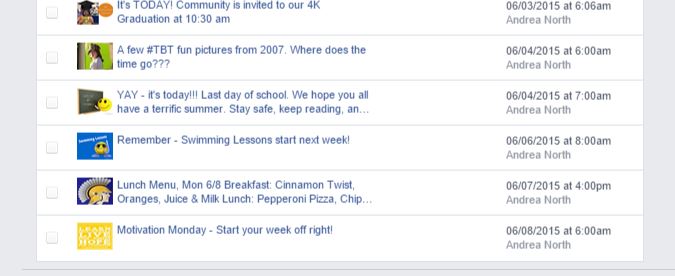
- This will bring you to a page that will show all future posts. To edit, just click the blue text.
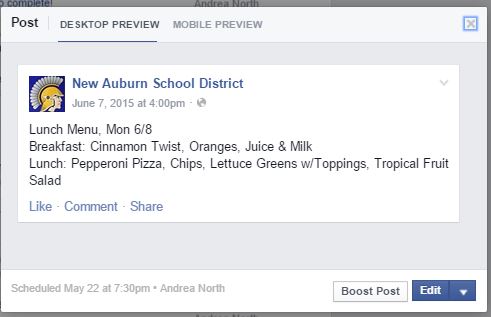
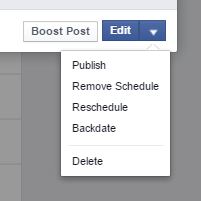
- When the box pops up at the center of the screen, you can edit the written text by pressing “Edit”. You can also hit the arrow to the right of that word to showcase other options as shown below.
You can alter almost anything once your post is scheduled, but you cannot change the image used. If you need to add or swap out an image – you’ll need to delete the post and start over again by pressing the “Page” tab at the top left corner to get back to your status box.
Now that you know how to schedule, how about scheduling some posts for the summer months? There is a recorded webinar on this topic that can be accessed by members only. If you are interested in joining us, learn more here.


